In this post we’ll set up plugins, install a theme, and configure wordpress securely.
In this series I’ll show how to create a simple, fast and security-conscious blog.
Part 1: Hosting / installation
Part 2: Plugins, upgrading PHP, HTTP security headers
Part 3: Caching, WAF and Optimizations
Part 4: Monitoring and performance testing
Upgrade wordpress
Upgrade wordpress and any default plugins or themes that have updates
Install theme
If you already have a theme you want to use, you can probably skip to the end of this section.
There are a bunch of great marketplaces. Wordpress’ builtin one and ThemeForest.net are some of the best. Click on Appearance -> Themes
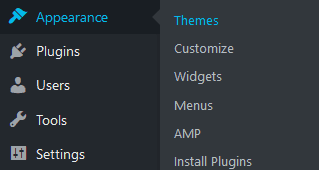
Click Add New and search for theme in Wordpress’ gallery or click Upload Theme and upload your theme zip

Activate your theme and install any plugins your theme comes with, and customize the theme as needed.
Remove all other themes, but keep one of the default wordpress ones (latest one preferred). This is important in case your theme has some serious bugs, and prevents the site from loading. All other ones are just a potential door to vulnerabilities.
Upgrade PHP
SSH into the VM
Check what version of PHP you have installed by running, you’ll need this later
php -v
Update apt-get, and add the ppa:onedrej/php repository, since the latest version isn’t included by default
apt-get update && apt-get upgrade
apt-get install software-properties-common
add-apt-repository ppa:ondrej/php
apt-get update
Remove the existing PHP version and install the latest (since this is a new install we can do both now, otherwise you’ll want to first install the new php and a plugin to check compatibility with the new php and verify everything is working before switching to the new one and removing the existing one)
apt-get remove php7.2
apt-get install php7.3
Install required and recommended libraries you’ll likely need
apt-get install php-pear php7.3-curl php7.3-dev php7.3-gd php7.3-mbstring php7.3-mysql php7.3-xml php7.3-bcmath php7.3-imagick
Enable PHP 7.3 in Apache, and disable the previous one. If doing this on an existing blog, run the update-alternatives command, which sets the new PHP as the default. This is optional
a2enmod php7.3
update-alternatives --set php /usr/bin/php7.3
a2dismod php7.2

systemctl restart apache2
Secure MySQL
Run the following and follow prompts
mysql_secure_installation
Set the password policy to high security, generate and enter a new long complex password, remove annonymous access, test accounts and test database, etc. Just follow the prompts, the script takes care of the rest.
Install the DigitalOcean metric agent
sudo apt-get purge do-agent
curl -sSL https://repos.insights.digitalocean.com/install.sh | sudo bash
Full guide: https://www.digitalocean.com/docs/monitoring/how-to/upgrade-legacy-agent/
Install Plugins
For security, I recommend starting with the following plugins:
WP fail2ban
Fail2Ban is an intrusion prevention software framework that protects computer servers from brute-force attacks. It comes pre-installed on the digital ocean droplet, so you just need to follow the prompts and enable it. Fail2ban scans log files (e.g. /var/log/apache/error_log) and bans IPs that show the malicious signs — too many password failures, seeking for exploits, etc.
Akismet Anti-Spam
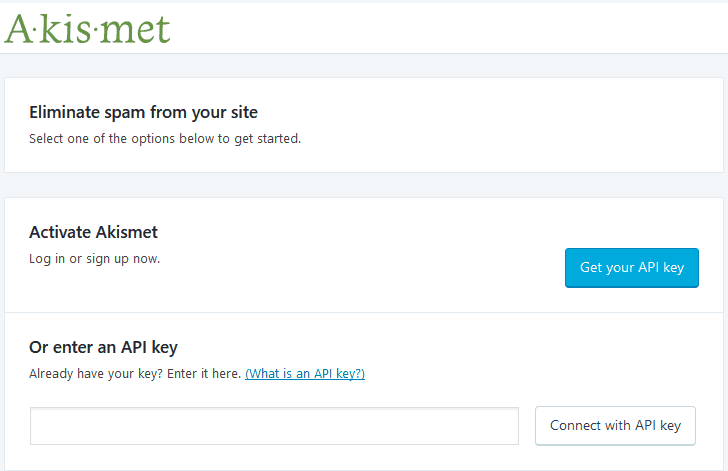
Akismet filters out your comment spam for you, so you can focus on more important things. Once you’ve installed it, head over to their site, set up an account and grab an API key.
AMP
If you use a compatible theme, or with some dev work on your theme, the site can be blazing fast, which is especially needed on mobile.

I suggest starting with Transitional if your theme doesn’t support AMP, which allows you to browse your posts as AMP by adding ?amp to the url, and working from there.
Google Analytics
Pretty straightforward as well, just link to your Google Analytics account or create one.
HTTP headers to improve web site security
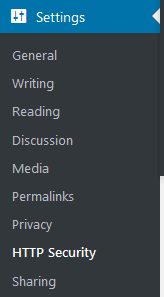
After it’s installed, go to Settings -> HTTP Security
HSTS
If you support HTTPS, which you really should, I recommend enabling Force HTTPS protocol, Include subdomains, Preload and with a max age of 6 months (2592000). This setting will tell browsers to always fetch your site using HTTPS even if they try going to the HTTP url, and they will remember that setting for 6 months.

https://developer.mozilla.org/en-US/docs/Web/HTTP/Headers/Strict-Transport-Security
Expect-CT
Google’s Certificate Transparency project makes it possible to detect SSL certificates that have been mistakenly issued by a certificate authority or maliciously acquired from an otherwise unimpeachable certificate authority. It also makes it possible to identify certificate authorities that have gone rogue and are maliciously issuing certificates. The Expect-CT header allows sites to opt in to reporting and/or enforcement of Certificate Transparency requirements.
If using Certificate Transparency monitoring from Cloudflare (configured later) you might not need this, but if you turn it on, this will take precedence and allow you to specify your own Report URI. So for now, let’s turn it on.

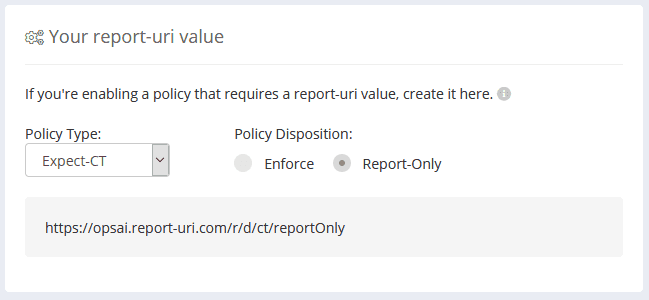
You’ll also need a place to receive these reports. I recommend https://report-uri.com/. Once you have an account and are logged in, go to Setup, and under Your report-uri value choose Policy Type: Expect-CT. Also choose if this will be for enforcement or report-only. I suggest Report-Only for now, this will depend a bit on the type of SSL certificate you serve to users.
https://developer.mozilla.org/en-US/docs/Web/HTTP/Headers/Expect-CT
X-frame-options
The X-Frame-Options HTTP response header can be used to indicate whether or not a browser should be allowed to render a page in a <frame>, <iframe>, <embed> or <object>. This header allows you to tell browsers where your site expects iframe content to come from, or deny it if you don’t use it.

https://developer.mozilla.org/en-US/docs/Web/HTTP/Headers/X-Frame-Options
Referrer policy
The Referrer-Policy HTTP header controls how much referrer information (sent via the Referer header) should be included with requests. This will depend on the type of site you have and what you’re getting from redirects. I suggest starting with strict-origin-when-cross-origin

https://developer.mozilla.org/en-US/docs/Web/HTTP/Headers/Referrer-Policy
Other headers
X-XSS-Protection
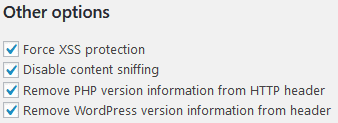
Force XSS protection allows browsers to stop pages from loading when they detect reflected cross-site scripting
https://developer.mozilla.org/en-US/docs/Web/HTTP/Headers/X-XSS-Protection
X-Content-Type-Options (Disable content sniffing)
Tells the browser that MIME types adertised in the Content-Type headers should be respected.
PHP version and Wordpress version headers
Any information disclosed by your application can allow an attacker to tailor their attack, but more importantly I think, there are automated botnets that try to exploit a specific vulnerability on any site they find, and this info could aid them in discovering targets faster.
Feature-Policy
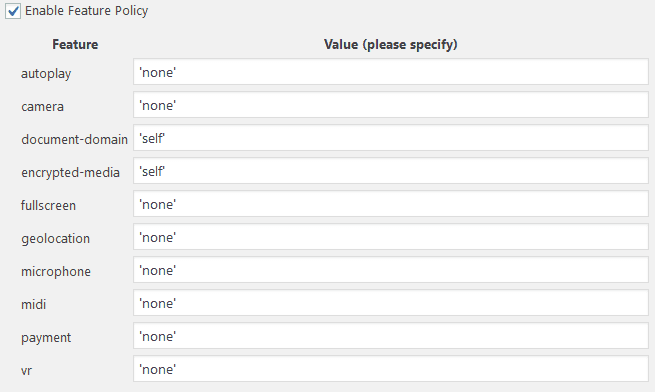
Switch to the Feature Policy tab next. The Feature-Policy header provides a way for you to inform the browser about the use of special browser features/apis your site might need to use like camera, microphone, gps, etc. If you don’t need to use a feature on a page, it’s safest to disable that feature, or provide a whitelist of where content can be loaded from.
https://developer.mozilla.org/en-US/docs/Web/HTTP/Headers/Feature-Policy
Content-Security-Policy
Finally, switch to the CSP options tab. Content-Security-Policy lets you specify where content on the page can be loaded from for each type directive that can load content. This header specifically will require proper testing of your site, and you should dedicate the time to getting it right. Improper configuration will prevent the browser from loading content such as images, external scripts (google analytics), fonts, etc.
Report-uri has a great resource for helping you build one. https://report-uri.com/home/generate/
https://developer.mozilla.org/en-US/docs/Web/HTTP/Headers/Content-Security-Policy
WordPress HTTPS
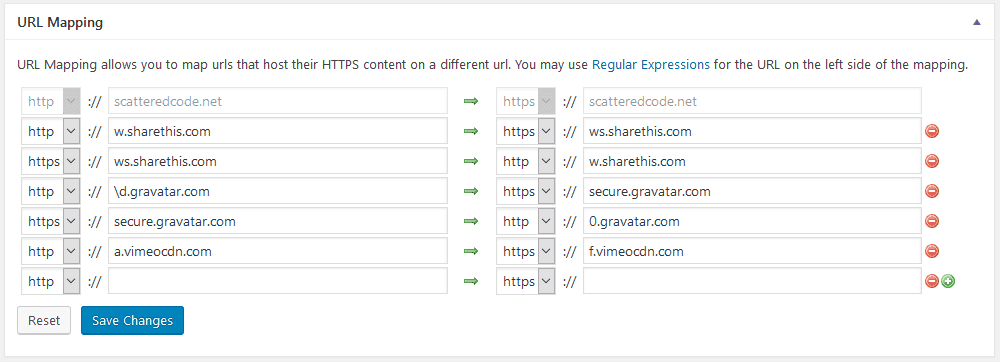
We’re already handling HTTPS settings, however this plugin is useful for its URL Mapping features. In cases where your theme or other plugins reference insecure 3rd party scripts, you can redirect them here to their secure version.
Google XML Sitemaps
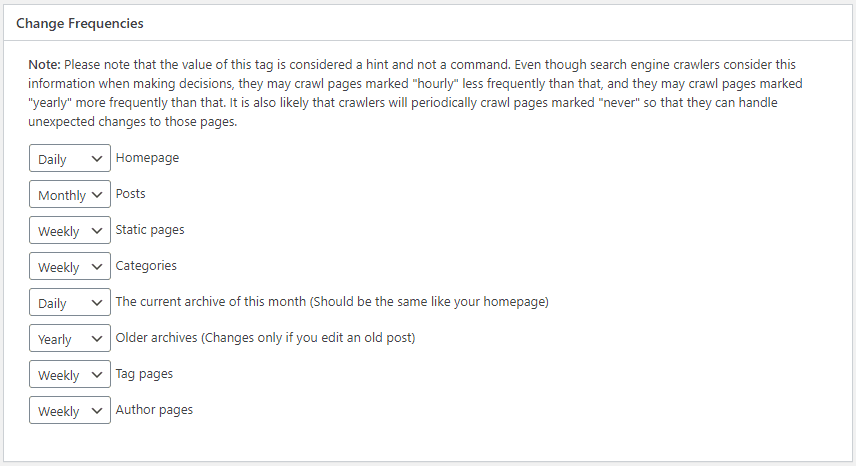
Google XML Sitemaps generates a sitemap that can be fed into your Google Search console to help find pages that aren’t reachable by the Google crawler, and allows you to configure the weight of different types of content. Once installed go to Settings -> XML-Sitemap, and browse through the identified pages and settings. I find that the defaults work pretty well in most cases, but make sure the Change Frequencies correspond to about how often you change content, and the Priorities make sense for your site.
Next, go to your Google Search Console https://search.google.com/search-console, select your site from the dropdown at the top left, and click on Sitemaps on the sidebar
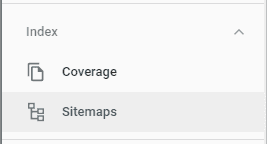
Under Add a new sitemap, enter your sitemap URL. If you left the settings above as default, it would be under https://[yoursite]/sitemap.xml and the full url should also appear in your robots.txt file.
Autoptimize
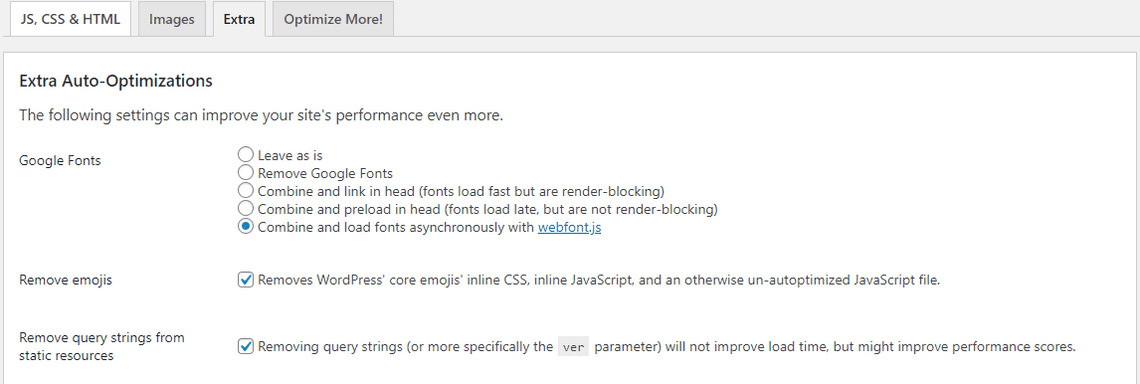
Autoptimize speeds up your website by optimizing JS, CSS, images (incl. lazy-load), HTML and Google Fonts, asyncing JS and more. Since we’ll be configuring Cloudflare for minification and content optimization, we won’t use much functionality from this plugin, but I find that it does a great job at optimizing images and lazy-loading fonts, so after installing, go to Configure and under the Images tab, check Lazy-load images

And under the Extras tab, check Combine and load fonts asynchronously, Remove emojis and Remove query strings from static resources.
Broken Link Checker
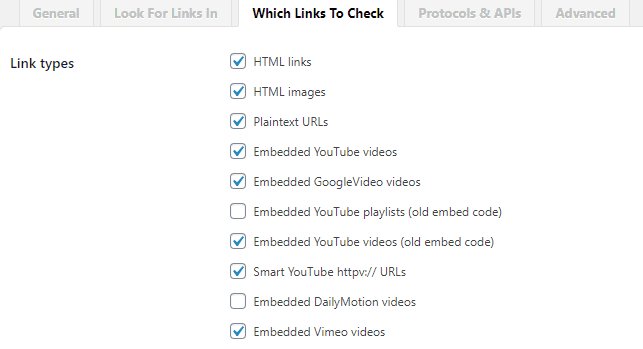
This plugin will monitor your blog looking for broken links and let you know if any are found. Defaults are fine, but I like to have it check the below link types just in case
WP GDPR Compliance
If you collect any type of user data, it’s best to inform your users of this. Be conscious of 3rd party tools you installed which may be collecting data, and make sure you understand and disclose what they are collecting and how they’re using that data.
Subscribe To My Newsletter
Quick Links
Legal Stuff


