Table Of Contents
DNS is one of the most fundamental components of today’s internet, one of the simplest technologies at the same time, but it’s also one of the biggest risks, and can be one of the best indicators when something is at risk. There are many cyber attacks that either have their root in DNS, or just use DNS just as a part of the structure of the attack without even thinking about it. Understanding your organization’s DNS traffic is a very solid step in protecting the overall organization. Monitoring DNS lookups with Elasticsearch and analyzing with machine learning can significantly reduce risk around several types of attacks. Here are some of the threats based in DNS and how to know about them.
DNS Poisoning
DNS cache poisoning, also known as DNS spoofing, is a type of attack that exploits vulnerabilities in the domain name system to make the DNS server serve an attacker’s response instead of the record you expected. Let’s say you requested an A record for www.example.com and expected to get 192.168.1.1, but instead you received the address 10.10.10.10 which looks just like the site you expected, but is in fact an attack site.
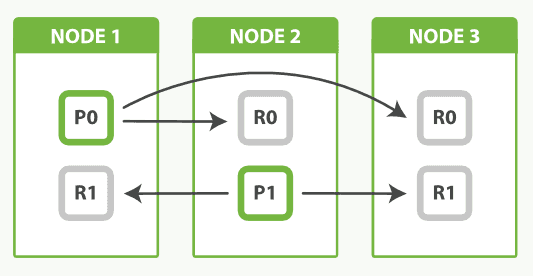
The most creative use I’ve seen around this involves vulnerabilities in the design of distributed NoSQL document store replication, where replication partner identity isn’t verified, and allows for dynamic adding of nodes. A really poor design would have unencrypted data stores, let’s say redis or elasticsearch, with no authentication between them, and referencing each other via DNS records open on the internet.

In this example, each node of the database has the following A records to refer to each other by:
NODE-1: server-a.example.com 10.10.1.1
NODE-2: server-b.example.com 10.10.1.2
NODE-3: server-c.example.com 10.10.1.3
At first glance, you have some public DNS A records, but they all point to internal IPs, not routable from the internet, so maybe it’s all safe.
Now the attacker manages to trick your DNS server into caching and serving the A record server-c.example.com 4.1.1.1 instead of your internal IP. Nodes A and B see that something happened to node C and it has no data, so naturally, in an effort to maintain the necessary replication factor, nodes A and B will start replicating all the data in their data stores to node C. But the problem is that they are now shipping a copy of your database, completely within the design of the system, to the attacker.
The same type of attack could also serve a user the IP address of a phishing site when wanting to log into a bank, and it would be very difficult for the user to know that anything is wrong.
Also, see mDNS (Multicast DNS) poisoning https://www.gnucitizen.org/blog/name-mdns-poisoning-attacks-inside-the-lan/ and the mDNS protocol https://en.wikipedia.org/wiki/Multicast_DNS
DNS Exfiltration
Possibly one of the cleverest attacks I’ve seen, DNS exfiltration is technically a way to steal data using DNS the way DNS was designed.
The basic way DNS works is:
- You ask your DNS server (usually a local DNS server in your organization) for a DNS record, let’s say a.example.com
- If the DNS server is the authoritative DNS server for that zone or cached it, it responds with the record and we’re done
- If not, it delegates the request to the next recursive DNS server that it knows about, gets the answer from that one, and responds
- That next recursive DNS server does the same, and this keeps going until you reach the authoritative server for the record; this is called DNS lookup chaining

Now let’s say an attacker got a malware payload into your network, and it got access to some sensitive data. Let’s also consider that you have Data Loss Prevention (DLP) solutions, and are blocking the infected computer from establishing connections to the internet outside of whitelisted IPs, but the computer can still query your organization’s DNS server for any record it wants.
The attacker can now split the stolen data into small chunks, encrypt them, Punycode encode the chunk, and ask your organization’s DNS server for the A record of [encrypted stolen data].myattacksite.com.

Your recursive DNS server would obviously not have it in cache. It would delegate to the next DNS server, and so on, until it reaches the authoritative DNS server for myattacksite.com. The attacker’s authoritative DNS server would take the encrypted data, store it, and return some random IP. If the attack uses CNAME or TXT records, this can even function as an encrypted message queue. And that’s about it, very simple attack to pull off, and it hasn’t broken any rules about how DNS was designed to work.
https://blogs.akamai.com/2017/09/introduction-to-dns-data-exfiltration.html
Phishing Domains
Phishing emails use attacker-registered or compromised domains to carry out attacks. The victim’s computer is going to request the A record for the phishing site (fakebank.com) from your corporate DNS server, before the user can access the site.
Remediation and reducing risk
Making sure that the latest version of DNS is being utilized throughout the organization. There are lots of new security features like port randomization and transaction IDs that are cryptographically secure to help guard against poisoning attacks. Turning on DNSSEC and making sure every DNS server verifies the entries it caches.
https://www.icann.org/resources/pages/dnssec-what-is-it-why-important-2019-03-05-en
Monitoring DNS Lookups with Elasticsearch and PacketBeat
A central SIEM (Security Information Event Management) is key to observibility, and using elastic stack as SIEM is the most all-encompassing and most extensive solution I’ve seen to date.
DNS always runs on port 53, usually over UDP because of its simplicity and speed, except for DNSSEC, which runs over TCP 53 because packets are usually larger than 512 bytes, and UDP can transmit a maximum of 512 bytes.
Install PacketBeat
Windows
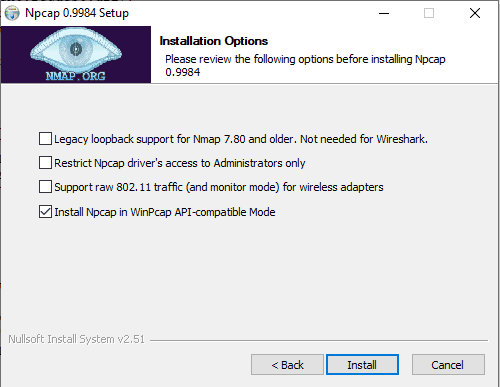
Download and install a packet sniffing library, such as Npcap, that implements the libpcap interfaces, and make sure to install Npcap in WinPcap API-compatible Mode

Install PacketBeat:
choco install packetbeat
APT
wget -qO - https://artifacts.elastic.co/GPG-KEY-elasticsearch | sudo apt-key add -
sudo apt-get install apt-transport-https
echo "deb https://artifacts.elastic.co/packages/7.x/apt stable main" | sudo tee -a /etc/apt/sources.list.d/elastic-7.x.list
sudo apt-get update && sudo apt-get install packetbeat
sudo systemctl enable packetbeat
YUM
sudo rpm --import https://packages.elastic.co/GPG-KEY-elasticsearch
Create a file with a .repo extension in /etc/yum.repos.d/ like /etc/yum.repos.d/elasticsearch.repo and add
[elastic-7.x]
name=Elastic repository for 7.x packages
baseurl=https://artifacts.elastic.co/packages/7.x/yum
gpgcheck=1
gpgkey=https://artifacts.elastic.co/GPG-KEY-elasticsearch
enabled=1
autorefresh=1
type=rpm-md
Install packetbeat and register as a service
sudo yum install packetbeat
sudo systemctl enable packetbeat
Open an administrative command line / terminal in the packetbeat directory and run
.\packetbeat devices
Note the interface you want to monitor. On windows it’s easier to refer to it by index due to really long names. On linux you can also monitor all interfaces.
Open packetbeat.yml and take out the packetbeat.flows section, since we don’t need it for this purpose and it generates a lot of data.
Under packetbeat.protocols remove all sections except - type: dns and ports: [53] under it, and add port 5353 for mDNS. ICMP and DHCP might also be worth monitoring on your DNS server
Update the Output to send to the Logstash instance in your datacenter, or to elastic cloud.
https://www.elastic.co/guide/en/beats/packetbeat/current/configuration-interfaces.html
Optionally load the kibana dashboards, useful if this is the first time you use packetbeat
.\packetbeat setup
And start the packetbeat service
Analyzing the Data
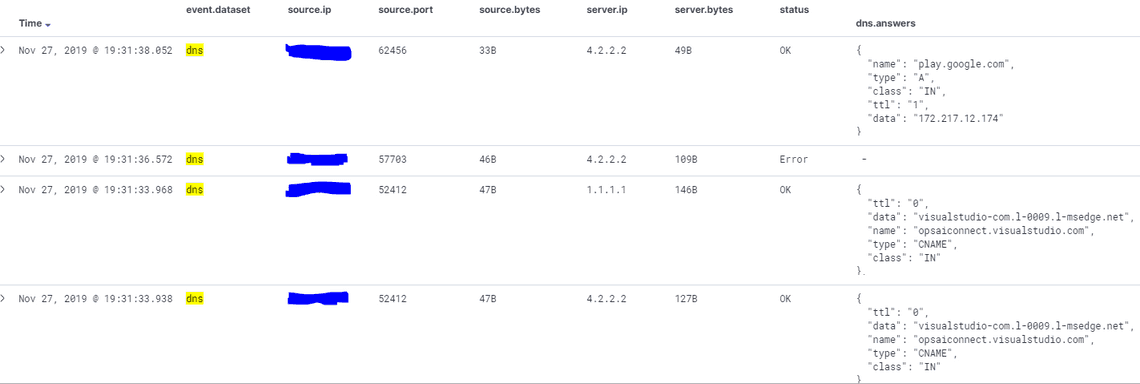
Now head over to Kibana, open Discover and select the new packetbeat-* index pattern

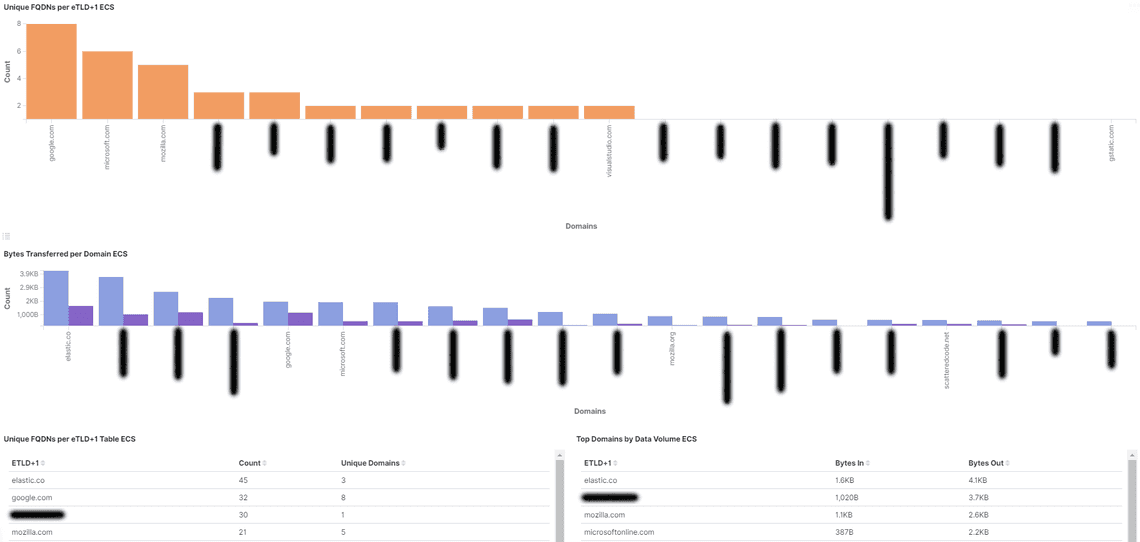
Looking at imported dashboards, the [Packetbeat] DNS Tunneling ECS can give you a quick overview and potential information about DNS exfiltration attacks by monitoring how much DNS data your network is sending to each domain

Machine Learning on DNS Traffic
Next, let’s head over to the Machine Learning tab and create some jobs. Create a saved query filtering our everything except for DNS data, and we’ll use that query as the datasource for the next steps.

You might want to wait a couple weeks before going forward, so you have enough data for a useful model.
First, let’s get an alert if we suddenly have an anomaly in the number of DNS queries, as this can indicate an attack. For this we’ll use a Single metric template.
Pick fields: let’s select Count(Event rate) and click Next

Give the job an id like dns-query-count, add it to a group like dns, then click Next and finally click Create Job. On the next screen click Start job running in real time

Next, click Create watch, this will be our notification. Let’s create one for anomalies over half an hour with a major severity, and receive an email when it happens.

Next let’s create a multi metric job to alert us when it detects DNS tunneling. We can do this by looking for number of unique FQDNs per domain as an indicator of compromise.
Under Pick fields, select dns.question.registered_domain, click Next, under Split field select dns.question.registered_domain, and under influencers select dns.question.registered_domain. Change the bucket span to 1h, and toggle on Sparse data. Click Next and give the job an ID like dns-tunnel-detection, add it to the dns group, click Next.

Then click Start job running in real time and Create watch
Other interesting reads
https://link.springer.com/chapter/10.1007/978-3-030-00470-5_7
https://www.solarwindsmsp.com/blog/what-is-dns-poisoning
https://blogs.akamai.com/2017/09/introduction-to-dns-data-exfiltration.html
Fun fact
Active Directory must be supported by DNS in order to function properly, however the implementation of Active Directory Services does not require Microsoft DNS. A CoreDNS server, BIND DNS or other third-party DNS will fully support a Windows domain.
Subscribe To My Newsletter
Quick Links
Legal Stuff


