Table Of Contents
What are feature flags?
Feature flags, also known as feature toggles or feature switches, are a powerful technique that allows developers to enable or disable specific features of their applications without deploying new code.
By using feature flags, development teams can gain better control over their releases, perform A/B testing, and minimize risk when introducing new functionality.
Flutter is Google’s UI toolkit that allows developers to build natively compiled applications for mobile, web, and desktop from a single codebase. In this tutorial, we’ll explore how to implement feature flags in a Flutter app using Toggly, a popular feature flag management tool.

Is using feature flags in flutter considered good practice?
Using feature flags in Flutter is considered good practice, as they provide a powerful combination for faster mobile development devcycle.com. Feature flags give developers control over feature releases, allowing them to turn features on and off in a live environment, test features with real users, and roll back changes if needed devcycle.com.
Feature flags can be particularly beneficial for mobile applications, as releasing and rolling back mobile apps can be challenging due to the app store approval process flagsmith.com. Using feature flags in Flutter allows developers to enable or disable features without going through the release process, reducing the time needed to deploy new features and increasing the overall release confidence flagsmith.com.
Prerequisites
Before diving into the tutorial, ensure you have a basic understanding of Flutter and the Dart programming language. You should also have a Flutter development environment set up and a simple Flutter app ready to demonstrate the implementation of feature flags. If you need help getting started with Flutter, check out the official Flutter documentation.
Choosing a Feature Flag Management Tool
There are several feature flag management tools available, each with its own strengths and weaknesses. Some popular options for Flutter apps include Firebase Remote Config, Toggly, LaunchDarkly and ConfigCat. When selecting a tool, consider factors such as ease of integration, scalability, pricing, and available features. For this tutorial, we’ll use Toggly to demonstrate the implementation process.
I’m biased to Toggly since my team built it, but we built it to solve several problems that our development community has, with our SDKs fully free and opensource and not dependent on any service including ours, while also committing to a free forever plan
Setting up the Feature Flag Management Tool
To begin, create an account at toggly.io and set up a new project.

Next, we’re going to install the feature_flags_toggly package into our app
$ flutter pub add feature_flags_toggly
Now, in your Dart code, you can use:
import 'package:feature_flags_toggly/feature_flags_toggly.dart';
Initialize toggly by running the Toggly.init method and providing your App Key
@override
void initState() {
  initToggly();
  super.initState();
}

void initToggly() async {
  await Toggly.init(
    appKey: '10855f2d-b20c-4498-aee7-371a459e7791',
    environment: 'Production',
  );
}
The library works standalone as well, by supplying a list of flag defaults
void initToggly() async {
  await Toggly.init(
    flagDefaults: {
      "ExampleFeatureKey1": true,
      "ExampleFeatureKey2": false,
      "ExampleFeatureKey3": true,
    },
  );
}
Now that we have that set up, we can use the Feature widget anywhere
Using the Feature Widget
Wrap your widgets in Feature widgets and provide them with the appropriate feature keys. This will show or hide the widget based on the value of the feature flag:
Feature(
  featureKeys: const ['ExampleFeatureKey1'],
  child: const Text('This text will show if ExampleFeatureKey1 is TRUE'),
),
Source: Feature Flags Package for Flutter
Using multiple feature keys and requirements
You can use multiple feature keys for one Feature widget and make use of the requirement (FeatureRequirement.all, FeatureRequirement.any) and negate (bool) options:
Feature(
  featureKeys: const ['ExampleFeatureKey1', 'ExampleFeatureKey2'],
  requirement: FeatureRequirement.any,
  child: const Text('This text will show if ANY of the provided feature keys are TRUE'),
),
Feature(
  featureKeys: const ['ExampleFeatureKey1', 'ExampleFeatureKey2'],
  requirement: FeatureRequirement.all,
  child: const Text('This text will show if ALL the provided feature keys are TRUE'),
),
Creating Feature Flags
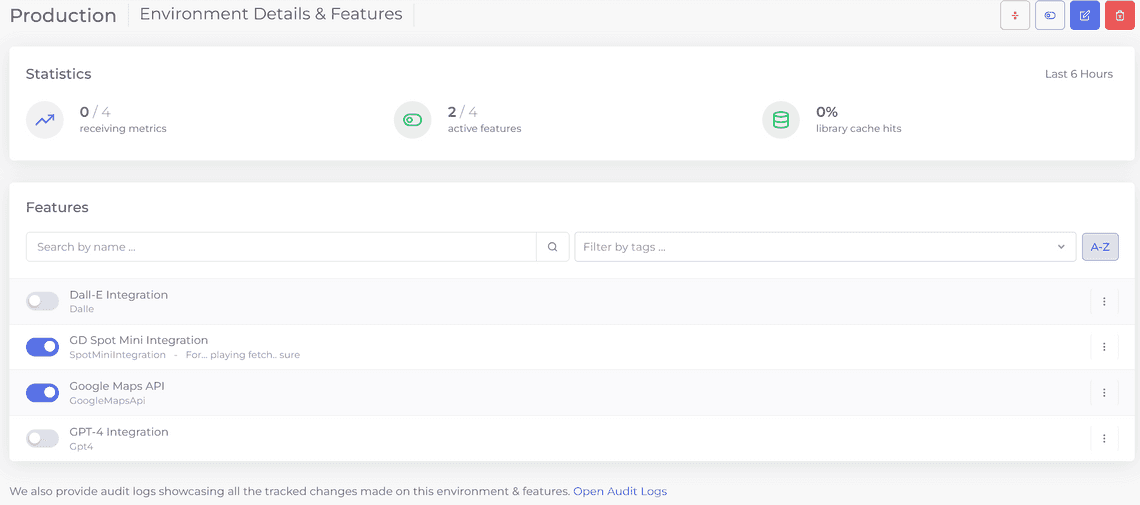
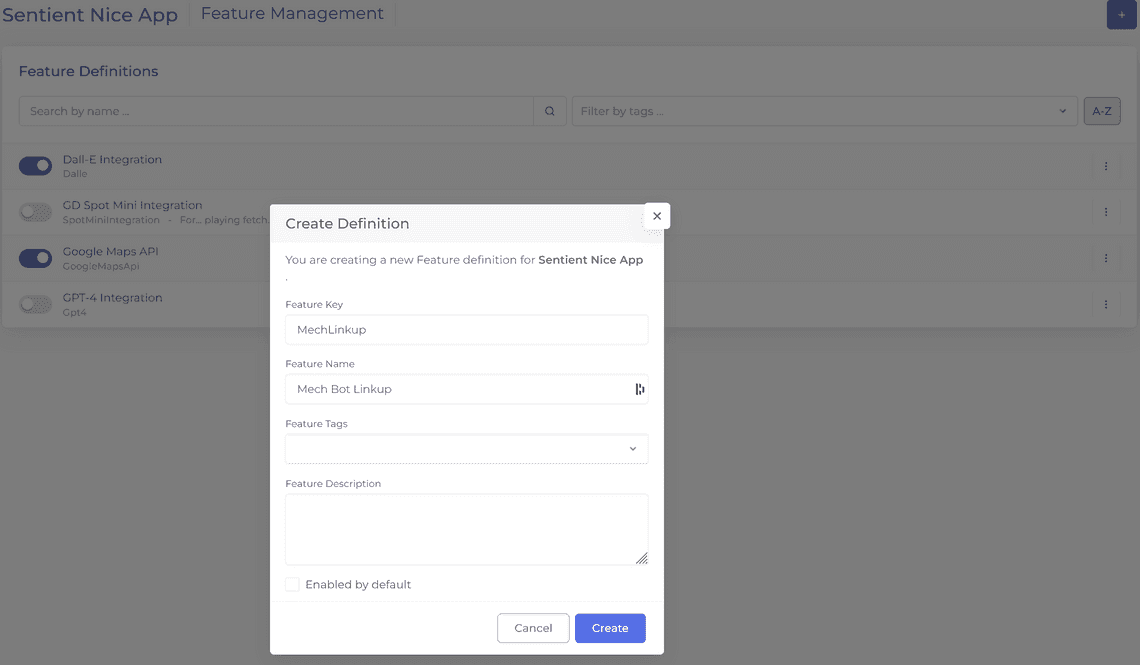
Start by defining some features you plan to control. Toggly will also detect features automatically once you run the app and a feature that doesn’t have a definition is requested

Managing Feature Flags in Action
Feature flags can be used in various scenarios, such as A/B testing or gradual rollouts.
Use case: A/B testing a new feature
To A/B test a new feature, go to the Production environment, click the menu next to the feature and click Rollout.

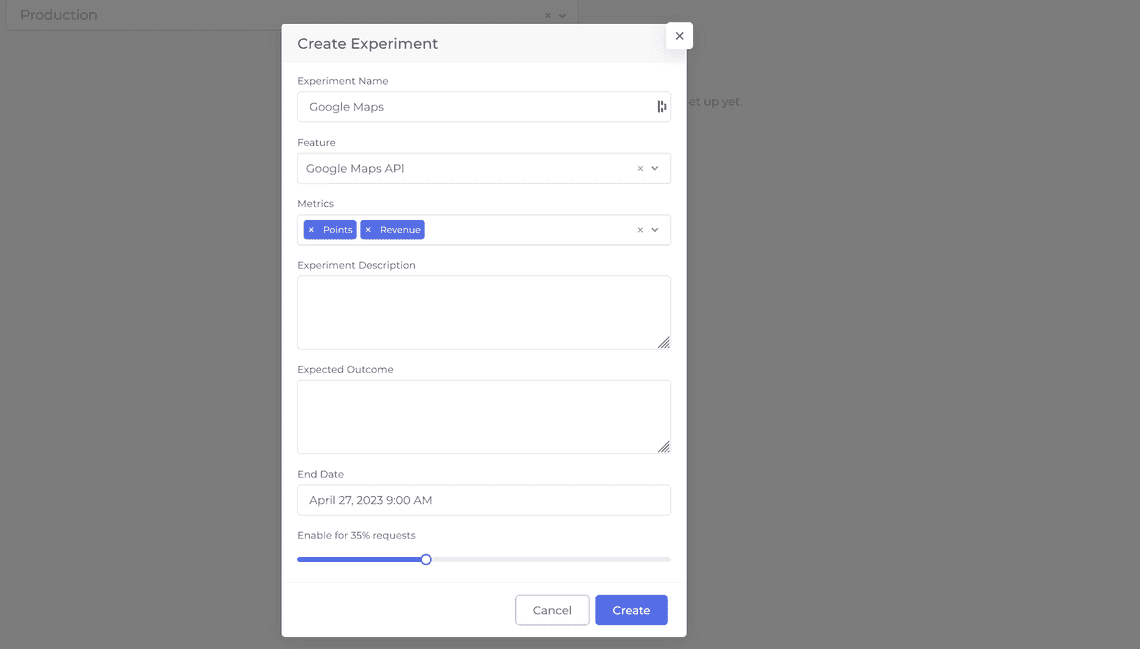
Or we can create an experiment, and record how the Google Maps API feature affects our Points and Revenue metrics by rolling it out to 35% of requests over 2 weeks

Analyze the test results and make data-driven decisions on whether to deploy the new feature or not. For a gradual rollout, configure percentage-based rollout rules and monitor the deployment progress. Adjust the rollout percentage as needed and fully launch the feature when ready, or roll it back if issues arise.
Best Practices for Feature Flag Management
Adhering to best practices when using feature flags is crucial for maintaining a clean and manageable codebase. Establish clear naming conventions and organize your feature flags logically within the management tool. Regularly review and remove outdated feature flags to avoid technical debt. Ensure proper access control and flag visibility within your team to maintain security and prevent unauthorized changes. Monitor your feature flags’ performance and usage to identify potential bottlenecks or issues.
Conclusion
In this tutorial, we’ve explored the importance of feature flags in app development and demonstrated how to implement them in a Flutter app using a popular feature flag management tool. By incorporating feature flags into your development process, you can gain better control over releases, minimize risk, and make data-driven decisions. We encourage you to continue exploring feature flags and tailoring their use to your specific development needs.
Related Posts
Subscribe To My Newsletter
Quick Links
Legal Stuff


